Appium is an open source test automation framework for use with native and hybrid mobile apps. It drives iOS and Android apps using the WebDriver JSON wire protocol. It’s a great tool for automating mobile apps. Here is a step-by-step tutorial for configuring Appium tool for Android apps automation.
We will use Eclipse and TestNG framework to run Appium automated test on Android device/emulator(If you have not configured TestNG on Eclipse, refer this tutorial). Let’s check out prerequisites of this setup process.
Prerequisites:
- Android SDK installed in system.
- Appium (You can get it from official Appium site)
- .NET Framerork 4.5
- Eclipse
- TestNG and Selenium 2 JARs
We will now start setting up Appium Android configuration from scratch. Follow below steps for the same.
- Install Android SDK in your system.
- Set ANDROID_HOME environment variable which points to your SDK directory’s \sdk\ folder.
- Append ‘%ANDROID_HOME%\platform-tools’ value to your PATH environment variable.
- Start your Android emulator or connect your Android device to your system (Make sure you have Android Debugging option enabled in your Android device).
- Open Command Prompt and navigate to your Android SDK’s \platform-tools\ directory (Eg. D:\adt-bundle-windows-x86_64-20130514\sdk\platform-tools).
- Run ‘adb devices’ command. You should see your connected devices listed in Command Prompt window.
- Run ‘adb start-server’ command. It will start ADB server which will be used by Appium to send commands to your Android device.
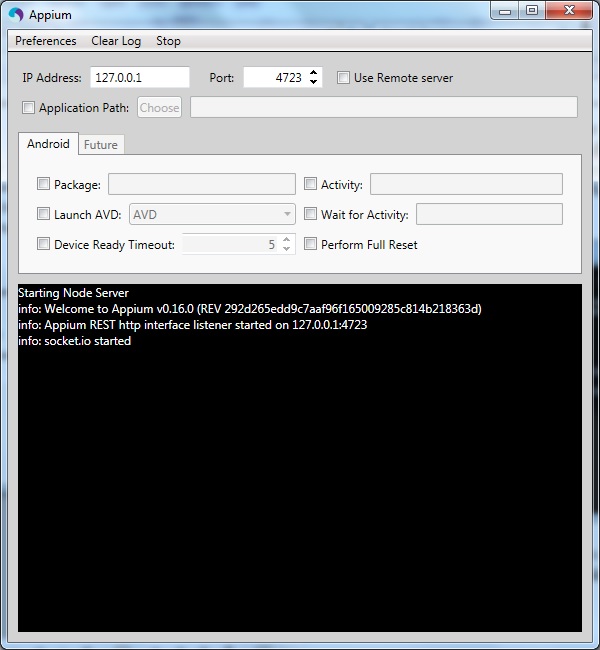
- Now, navigate to Appium directory in your system and start Appium by clicking Appium.exe file.
- Click Launch button. Your Appium console should be displayed as below.
- Create a Java project in your Eclipse and reference Selenium 2 and TestNG JARs.
- Create a new Java class in your project and enter below code.
package com.appiumproj.test;
import java.net.MalformedURLException;
import java.net.URL;
import org.openqa.selenium.By;
import org.openqa.selenium.WebDriver;
import org.openqa.selenium.remote.CapabilityType;
import org.openqa.selenium.remote.DesiredCapabilities;
import org.openqa.selenium.remote.RemoteWebDriver;
import org.testng.annotations.AfterClass;
import org.testng.annotations.BeforeClass;
import org.testng.annotations.Test;
public class Appium {
WebDriver driver;
@BeforeClass
public void setUp() throws MalformedURLException{
DesiredCapabilities capabilities = new DesiredCapabilities();
capabilities.setCapability("device", "Android");
capabilities.setCapability(CapabilityType.BROWSER_NAME, ""); //Name of mobile web browser to automate. Should be an empty string if automating an app instead.
capabilities.setCapability(CapabilityType.VERSION, "4.4");
capabilities.setCapability(CapabilityType.PLATFORM, "Windows");
capabilities.setCapability("app-package", "APP PACKAGE"); //Replace with your app's package
capabilities.setCapability("app-activity", "APP PACKAGE.ANDROID ACTIVITY"); //Replace with app's Activity
driver = new RemoteWebDriver(new URL("http://127.0.0.1:4723/wd/hub"), capabilities);
}
@Test
public void Cal(){
driver.findElement(By.name("Weather")).click();
}
@AfterClass
public void tearDown(){
driver.quit();
}
}
Run your test using TestNG.
Let us know in the comments how this Appium Android configuration tutorial work for you.
Comments
Post a Comment