
Capture Multiple Screenshots in Selenium WebDriver

If you have an automated test case which involves testing of continuous application flow, there is always a chance that you want to capture series of screenshots. If you have ever encountered such need and have wondered how it’s done, look no further than MultiScreenShot. A nice little utility to capture multiple screenshots. Not only this. It also lets you take screenshot of individual element and minimize the browser.
In this post, we will see how we can setup this utility with Selenium WebDriver and use it to capture multiple screenshots. We have taken a simple example of About Google page to explain this process. Let’s get into action. Follow below steps to setup and use MultiScreenShot.
  • Download MultiScreenShot JAR file from here.
  • Associate the downloaded JAR file in your Selenium WebDriver project by adding it into Java Build Path.
  • Import below package in your class file.
  • To use MultiScreenShot, you need to create an object of it as shown in below code. It takes 2 arguments. First is a path to save the screenshot and second is a class name. Here, class name is used to create the folder and save the screenshot inside that.
  • Now, you can just add below code to capture screenshots of your tests.
  • Your method code should look like below after performing all above steps.
@Test
public void GoogleAbout() throws Exception {
  driver.get(baseUrl);
  driver.findElement(By.linkText(Prop.getProperty("AboutLinkText"))).click();
  MultiScreenShot multiScreens = new MultiScreenShot("C:\\New\\","GoogleAbout");
  multiScreens.multiScreenShot(driver);
  driver.findElement(By.linkText("More about our philosophy")).click();
  multiScreens.multiScreenShot(driver);
}

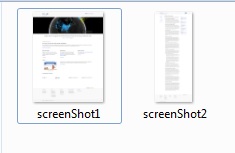
On running this method, MultiScreenShot captures multiple screenshots and stores them in a folder. Below image shows the output of above example.


Apart from taking multiple screenshots, you can also take screenshot of individual element using by using this code.
And minimize the browser using this code.
All in all, a nifty tool to help you in your Selenium tests. Give it a try and let us know how it goes for you.

Comments

Popular posts from this blog

SSO with SAML login scenario in JMeter

SAML(Security Assertion Markup Language) is increasingly being used to perform single sign-on(SSO) operations. As WikiPedia puts it, SAML is an XML-based open standard data format for exchanging authentication and authorization data between parties, in particular, between an identity provider and a service provider. With the rise in use of SAML in web applications, we may need to handle this in JMeter. This step-by-step tutorial shows SAML JMeter scenario to perform login operation. First request from JMeter is a GET request to fetch Login page. We need to fetch two values ‘SAMLRequest’ and ‘RelayState’ from the Login page response data. We can do this by using  Regular Expression Extractor . These two values need to be sent in POST request to service provider. Refer below image to see how to do this. We will get an HTML login page as a response to the request sent in 1st step. We need to fetch values of some hidden elements to pass it in the next request. We can do this b

Reading data from text file in SoapUI using groovy script

How to read data from text file in SoapUI. SoapUI Pro has some advance feature which is not in SaopUI as data fetching from external sources so in SoapUI we use Groovy script for that. Following are the peace of groovy script code for reading data from text file. 1. Reading all data from text file. //reading all txt file at once File file = new File("E://TestData.txt") fileContent = file.getText()                  log.info fileContent 2. Reading data line by line from text file. //reading text line by line File file1 = new File(" E://TestData.txt ") List textLine = file1.readLines() log.info textLine 3. Reading data randomly of any line from text file. //reading text randon line number File file2 = new File(" E://TestData.txt ") List textLine2 = file2.readLines() rowIndex  =  Math.abs(new Random().nextInt() % 4 + 1) log.info textLine2[rowIndex]

VBScript Code - Function to convert CSV file into excel and viceversa in QTP using VBScript

We at times are required to convert excel files into csv to read as flat files and sometime require to convert a csv file into excel file to use excel features on the data.   Below function shows how to convert an csv file into excel file and vice versa. We can also convert to other formats based on constants Here constant value 23 is used to create a csv file and constant -4143 to save a file as xls file. Once the destination file is created, we can delete the source file as shown below.  In case of any issue in understanding the code, please add in comment section Call func_ConversionCSVExcel("E:\Test.csv", "E:\Test_converted.xls", "csvtoexcel") Public Function func_ConversionCSVExcel(strSrcFile, strDestFile, Conversion) on error resume next Set objExcel = CreateObject("Excel.application") set objExcelBook = objExcel.Workbooks.Open(strSrcFile) objExcel.application.visible=false objExcel.application.displayalerts=