How can we Install JIRA In Windows?
- JIRA can be used as cloud environment and Server or Company's own environment.
- For Cloud environment, User does not need to install jira software.
- For Server, User needs to install JIRA on the Server or System.
- JIRA is license version software project management tool. User has to but it.
- They also give 30 days’ free trial.
Prerequisite : Java software should be installed in your system and JAVA_HOME environment variable should be set. Follow the steps given on THIS PAGE if it is not installed in your system.
- For company’s own environment set up, we need to Install JIRA for available port.
- You can download 30 days free trial of jira from THIS LINK.
- It will show you screen like bellow. Click on Download button to start downloading jira software.
- After download, Take .exe file on desktop do double click on icon and 'Run' it.
- Now you need to click on 'Next' button.
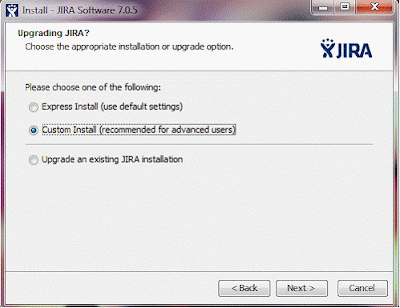
- Then again one screen will be displayed, here you need to select 'Custom Install'
- We can do installation for server and particular system.
- Select destination directory and click on ‘Next’.
- Use default ports first. If 8080 port is used here, You can enter here Server's Port also. JIRA will run on that particular port only.
- This is the last step for installation of Customize service of JIRA.
- Now If user wants to access JIRA then he should enter URL as IP Adrress:Port number/
- For Example 10.34.56.166:8080/
- Take Here IP Address(System where jira is installed) as 10.34.56.166, Port- 8080
- User will get login screen as shown bellow after installation.
How to create account on JIRA using Cloud Environment
- For Cloud Service, User Need to create account from THIS PAGE by entering valid email address and Password then verification mail has been sent to them.


Comments
Post a Comment